Going live: publishing your app
Once your team has something running in Preview, only you can see it. This tutorial covers the other half of the story: publishing that app to a real, reachable address, and what changes once it’s live.
Before you start
- A TalkIDE project with an app already built, or being built, by Mara’s team. If you haven’t gotten that far yet, start with Your first app.
- You’re looking at the project’s workspace, with the Preview panel open next to your chat.
Preview and Publish, in short
While you’re working with the team, you’re looking at a live-updating preview: it changes as the team builds and updates your app. Nothing about that preview is public. Publishing is a separate, deliberate step, and nothing you’ve built goes live until you take it.
Publish once, and your app gets a real, public address. Publish again later, after more changes, and the same button pushes the new version live.
Step 1: Watch your app take shape in Preview
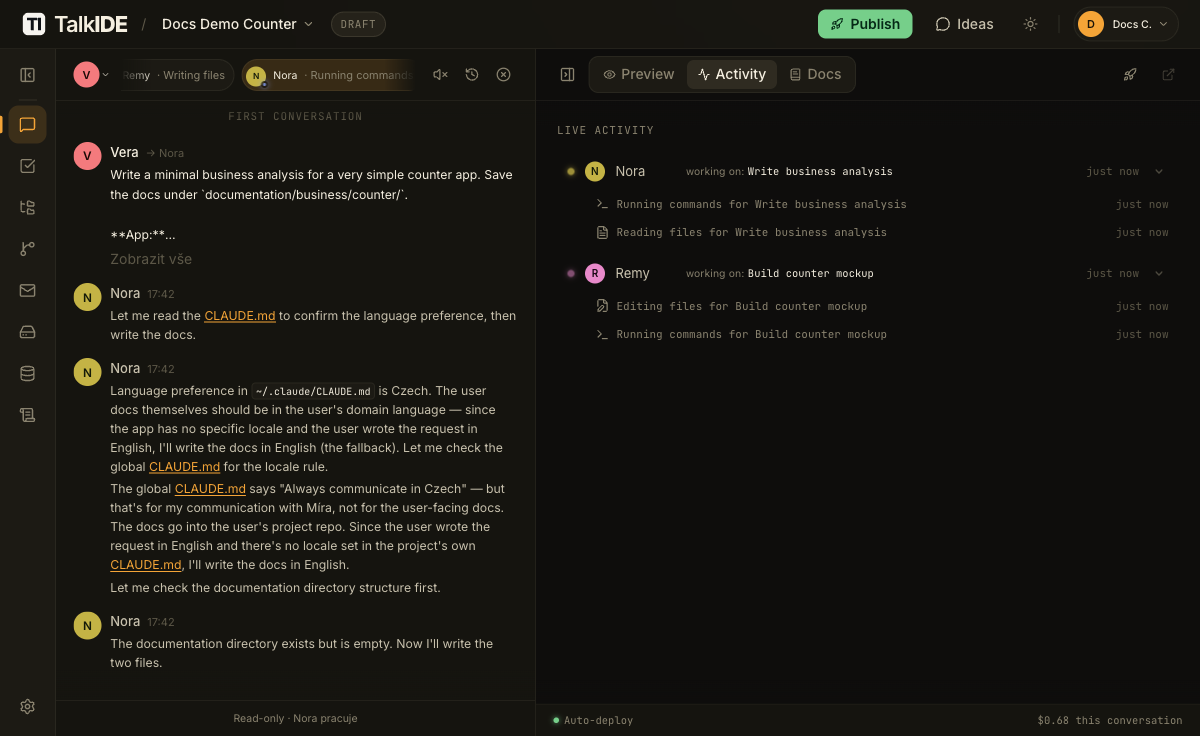
While the team works, the Live Activity panel shows what each teammate is doing right now, so you’re never just watching a spinner.
Once they’re done, the finished app renders directly in the Preview panel, and the team lets you know it’s ready.
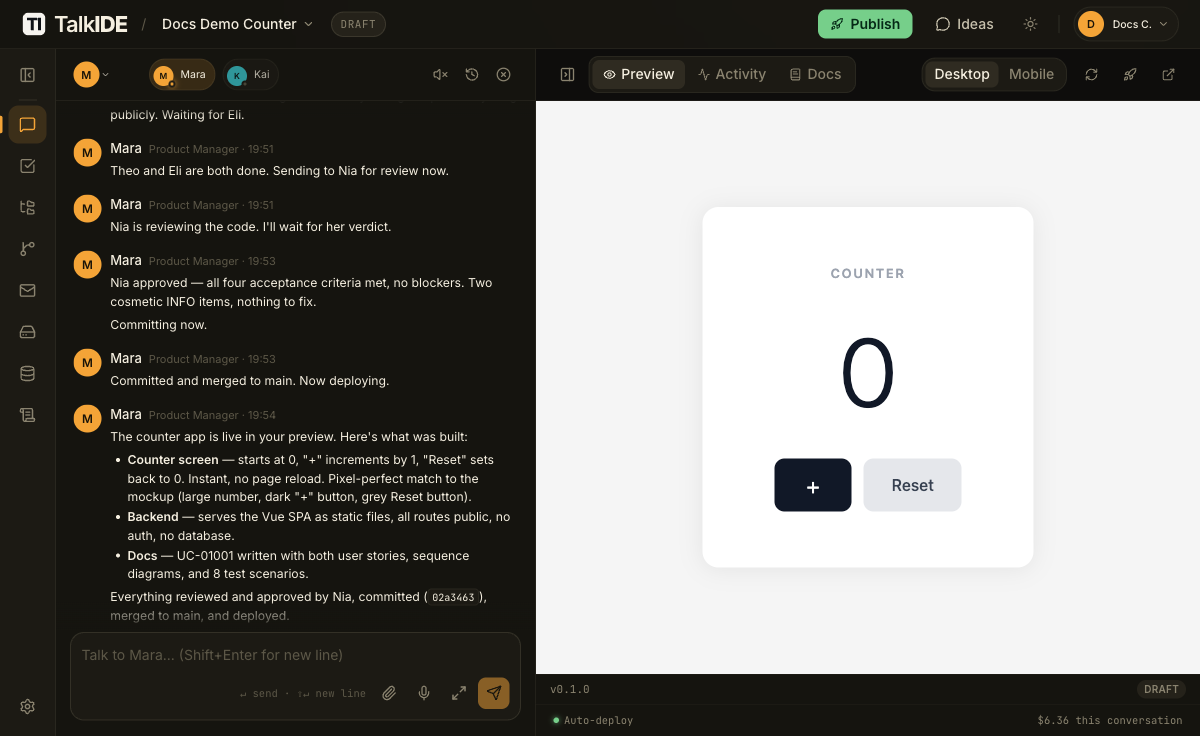
Click around, ask for changes, and repeat until you’re happy with what you see. Nothing here is public yet.
Step 2: Click Publish
When you’re ready, click Publish in the top bar. The first time you publish a given project, a dialog opens asking you to choose an environment to publish to.
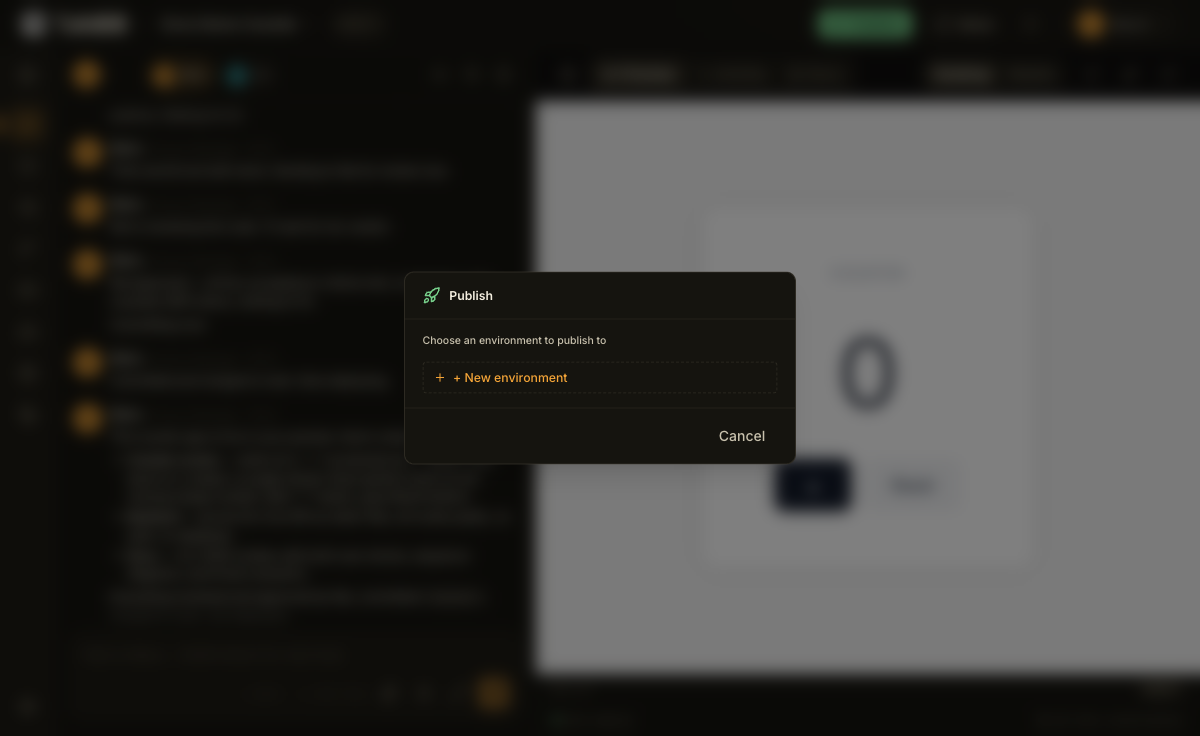
If you don’t have one yet, click + New environment. A short naming step follows: give it a name, and TalkIDE generates a URL-safe slug from it automatically (lowercase letters, digits, and hyphens). Each environment gets its own database, so see Environments and deployments if you’re publishing to a second environment and want to know what carries over.
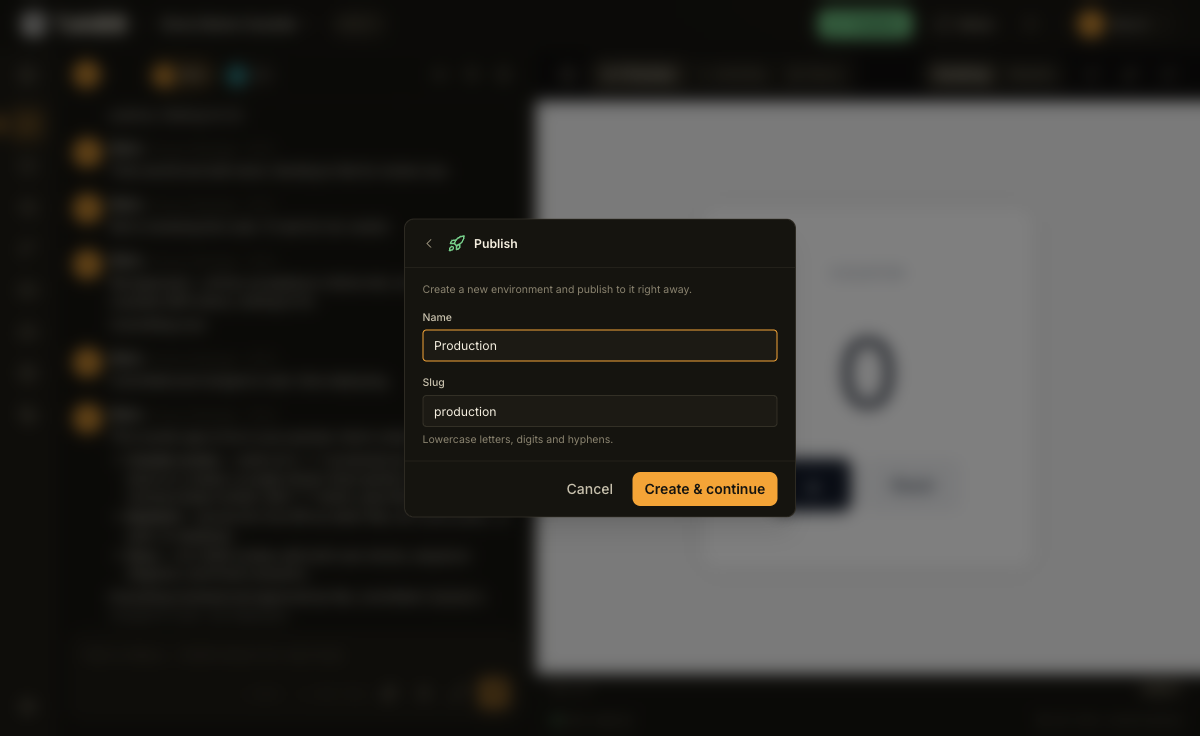
Click Create & continue.
Step 3: Pick your subdomain
Next, choose the subdomain your app will live at. TalkIDE checks it for availability as you type, so you know right away if it’s free.
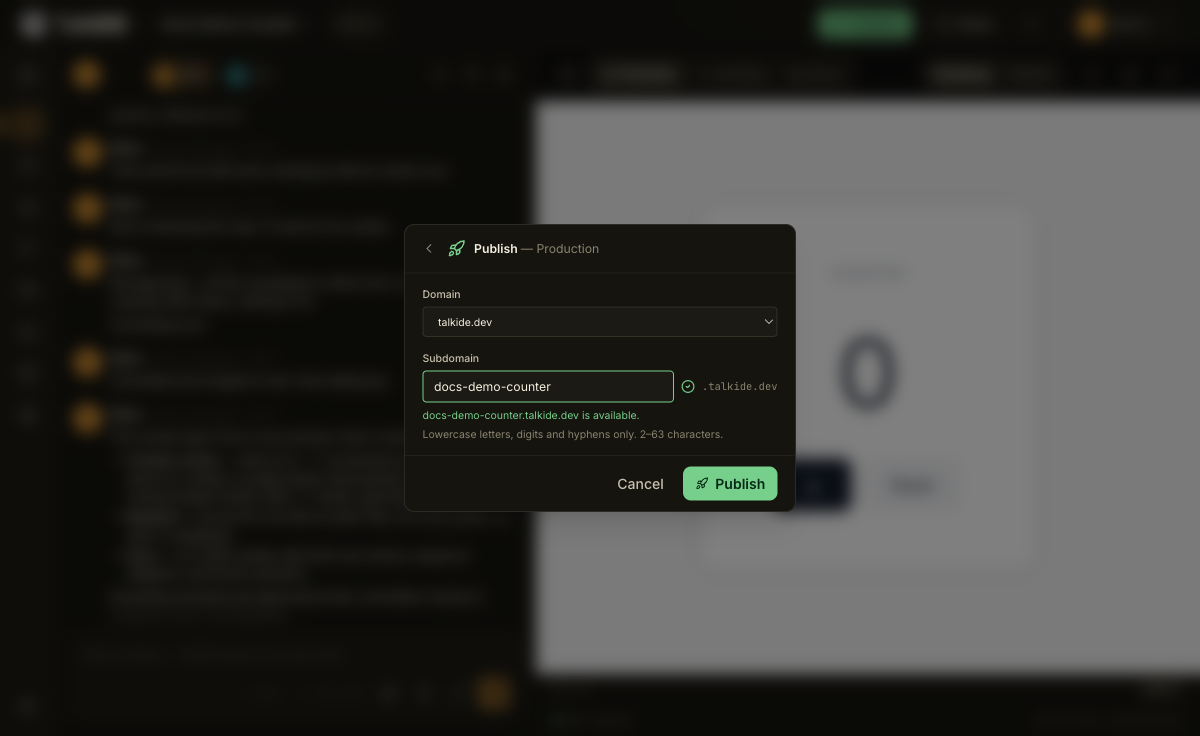
Once it’s available, the Publish button is enabled. Your app’s address will be <your-subdomain>.talkide.dev, TalkIDE’s own shared domain, different from the random-looking preview address you had before.
If you’ve published this environment before, this whole step is skipped: your domain and subdomain are already filled in from last time, and the button becomes a one-click Republish.
Step 4: Let it go live
Click Publish (or Republish) to confirm. Publishing is asynchronous: a progress stepper shows Building, then Live. Expect a short wait while your app builds. There’s no fixed duration to promise here; some builds finish quickly, others take a bit longer.
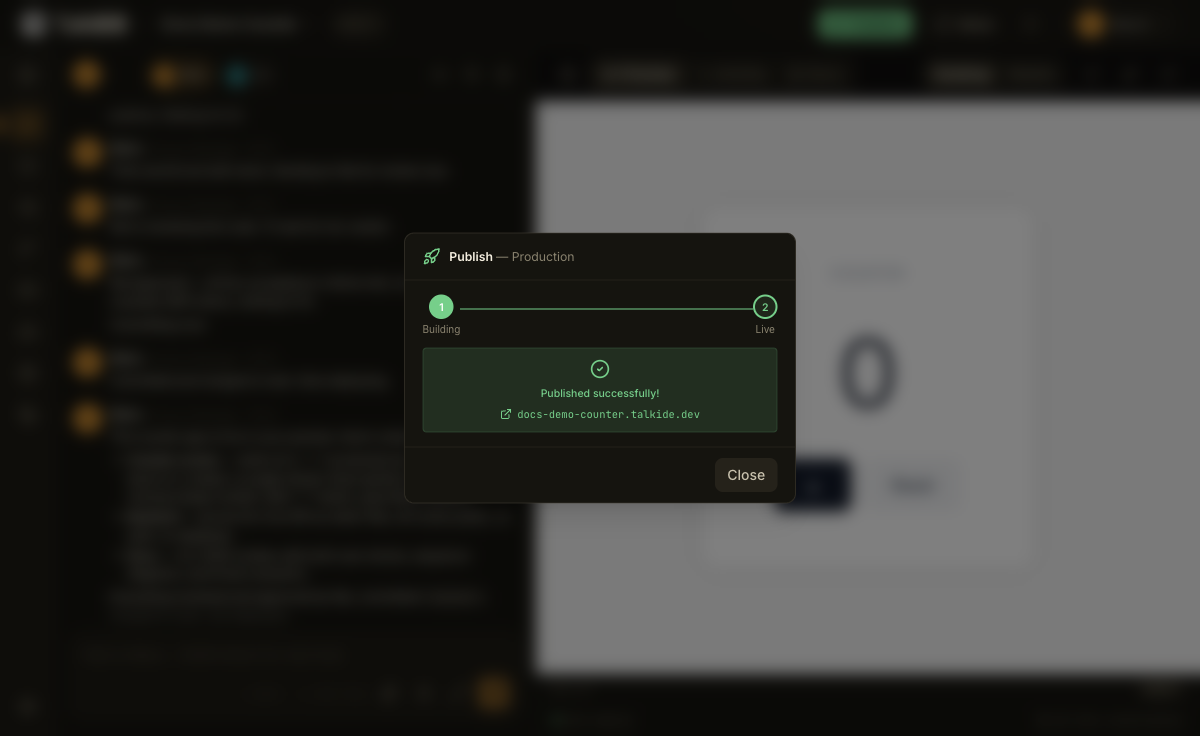
Once it finishes, you’ll see a green Published successfully! confirmation with your live address as a clickable link. If a publish ever fails partway, whatever was live before keeps running: publishing doesn’t take your app offline while it retries.
Putting your own domain on it
Your app is reachable at <your-subdomain>.talkide.dev right away, but you can also point your own domain at it. That lives under Domains in the Studio navigation, a top-level section rather than something tucked inside a single project.
TalkIDE checks your domain and recommends one of two ways to connect it: a single CNAME record at your current registrar, which leaves everything else about your domain untouched, or full NS delegation, where TalkIDE takes over the domain’s DNS entirely. Either way, TLS is set up automatically once the DNS is in place. The only manual step is adding a record at your registrar and waiting for it to propagate, which can take a few hours and in rare cases up to 48 hours.
You can attach more than one domain to the same app, and your original <subdomain>.talkide.dev address keeps working even after you add a custom one.
For the full step-by-step, see Connect a custom domain.
Where your app runs
TalkIDE currently runs everything in a single region in the United States. Multi-region hosting, including options for EU-based teams, is planned but not available yet. If that matters for your project, it’s worth keeping in mind before you go live.
Watch out for
- Publish is manual, every time. Nothing in your preview is public until you click Publish, and republishing is a deliberate click too, not automatic.
- You choose the subdomain, it’s never guessed for you. TalkIDE checks it for availability while you type.
- A failed publish doesn’t take you offline. Whatever was live before stays up while a new attempt runs.
- Previews can’t be shared. If you want someone else to see the app before it’s public, publish it first.
Related
- Connect a custom domain: the full step-by-step for adding your own domain once you’re live.
- Regions and data residency: where TalkIDE hosts your app and data today, and what’s planned.
- Your first app: start here if you haven’t built anything yet.
Thanks for the feedback.