Inviting a teammate
Most people start on TalkIDE alone. You sign up, you get an Individual account, and you build. At some point though, you want someone else in there with you: a co-founder, a developer, a designer, anyone who should see the same projects you do.
This tutorial walks through exactly that: turning a solo workspace into a shared one, and inviting your first teammate into it.
Before you start
- You need a TalkIDE account, signed in and looking at your Studio.
- Your account type, Individual or Organisation, is a choice you make once, at signup. If you already picked Individual and are only now thinking about a teammate, that’s exactly who this tutorial is for. If you’re still deciding which to choose at signup, read on too: everything below is what your workspace looks like on the Organisation side.
Individual or Organisation, in short
An Individual account is just you: one person, one owner, no one else to manage. It’s what you get by default if you don’t choose otherwise at signup, and there’s no way to invite anyone into it.
To bring someone else in, you need an Organisation. An organisation has exactly one Owner, who can invite and manage members, and any number of Members. Members of an organisation get access to all of that organisation’s projects, there’s no separate list to configure per project.
If you already have an organisation, skip ahead to the Members tab below and invite away. If you’re starting from an Individual account, start here.
Step 1: Create an organization
Click your avatar in the top right and choose Account.
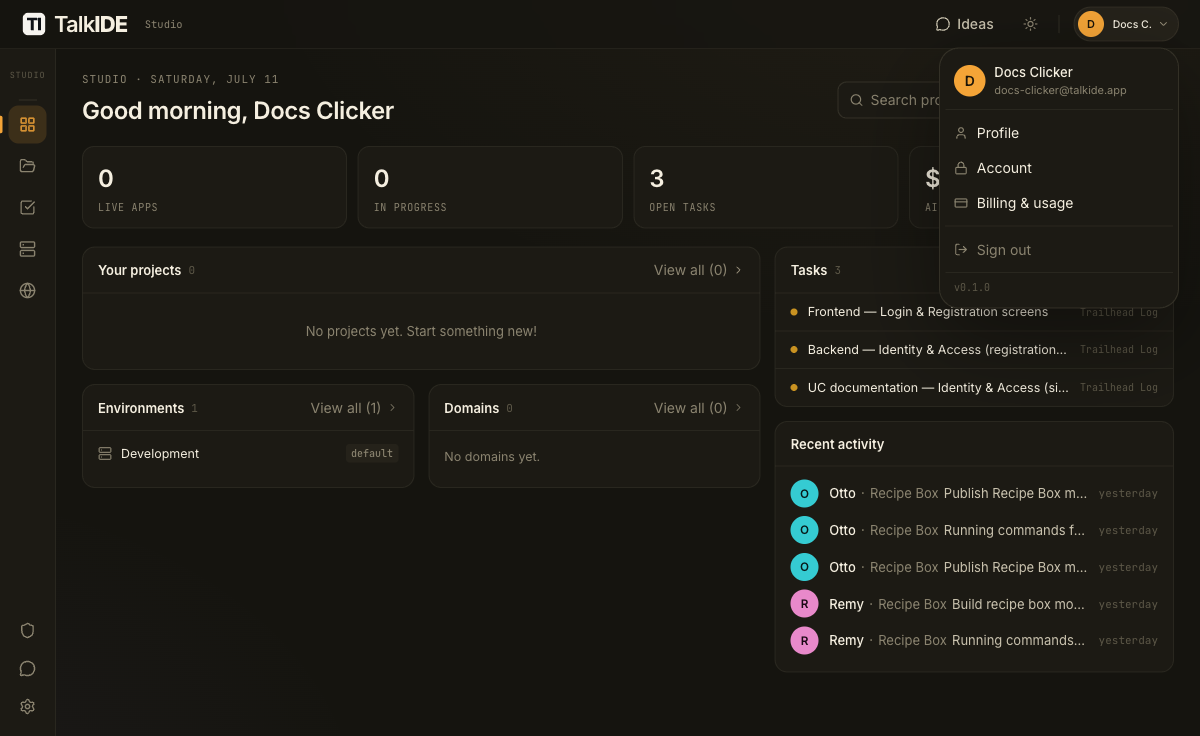
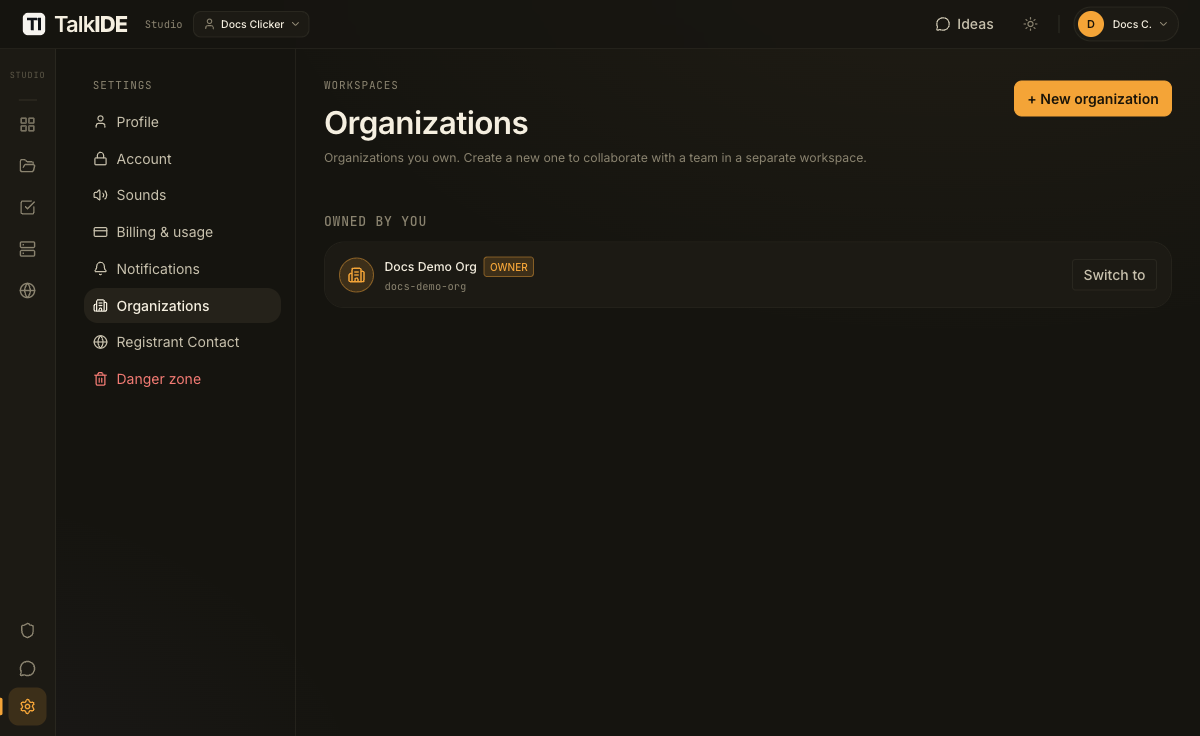
Open the Organizations tab. This tab is always there in your settings, whether or not you’re currently working inside an organization. If you don’t own one yet, you’ll see an empty state and a button to create one.
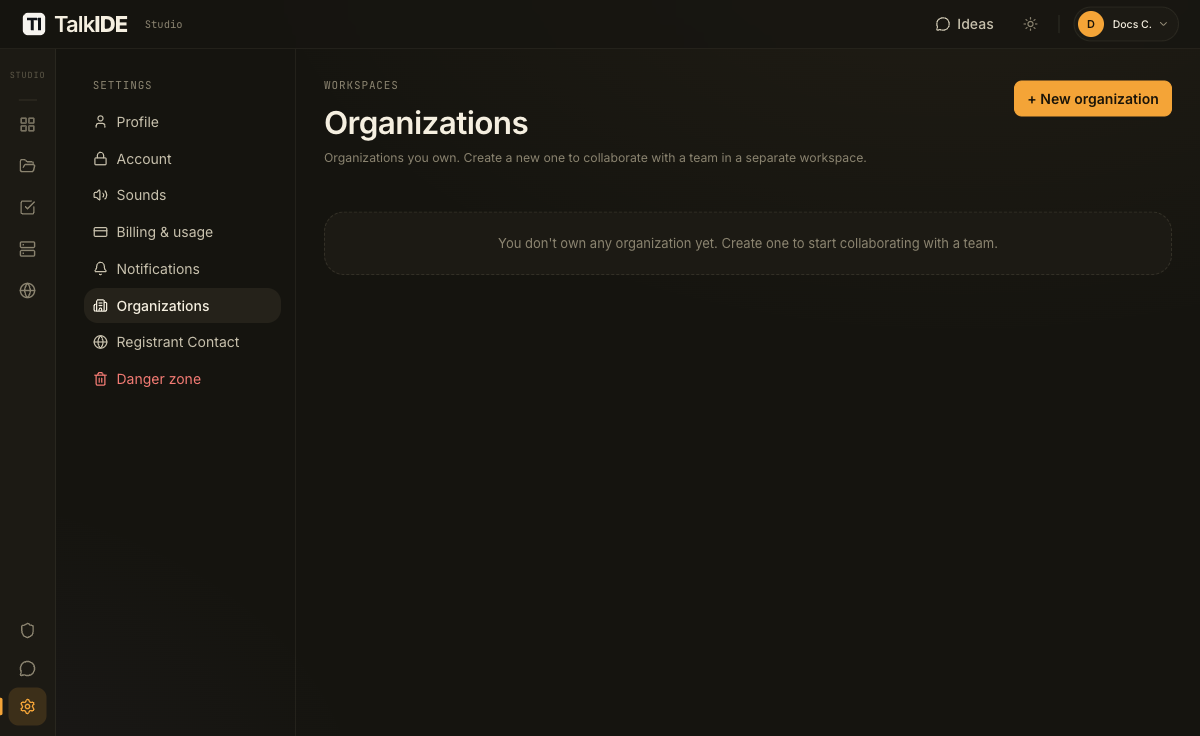
Click + New organization. A short dialog opens asking for an organization name.
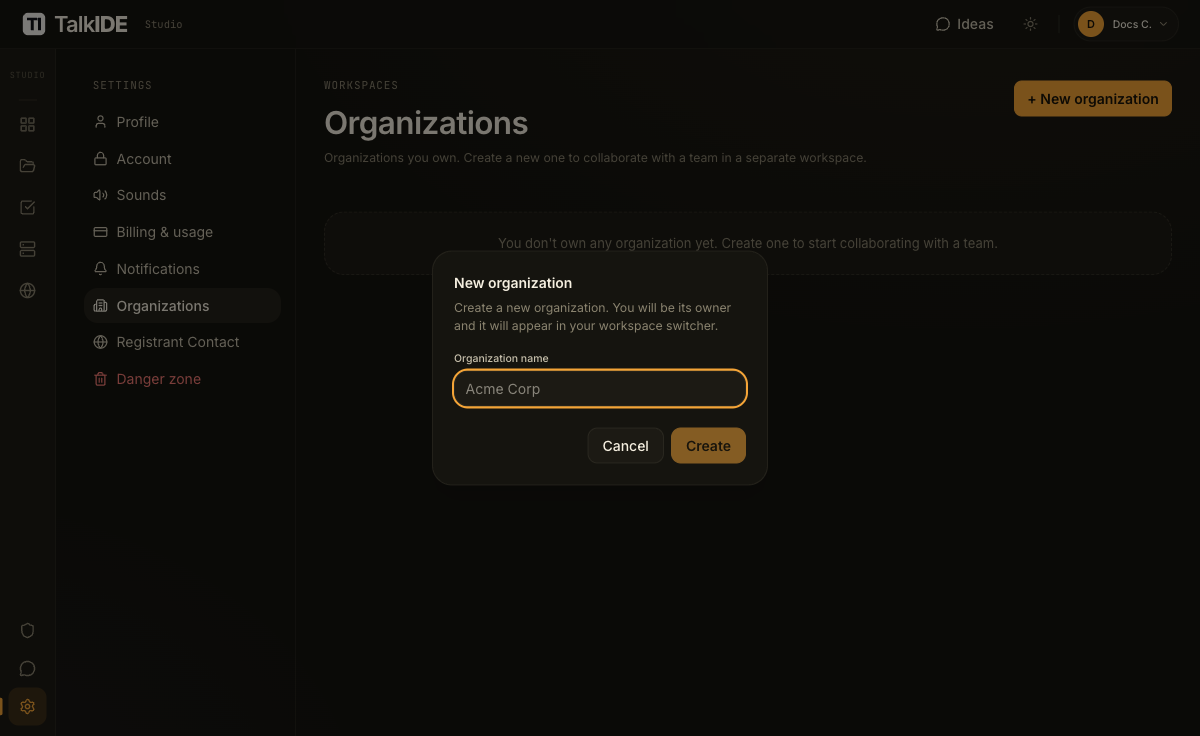
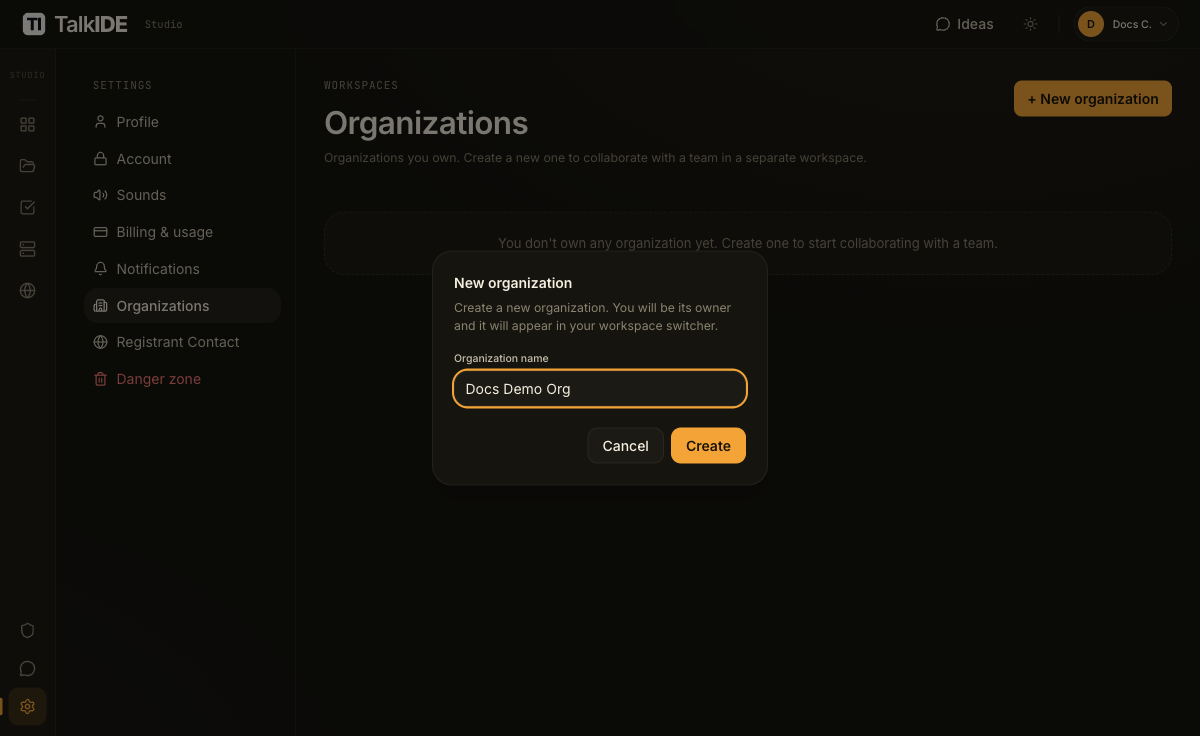
Type a name and click Create.
Your new organization appears in the list right away, with you listed as its owner. Click Switch to to move into it.
Once you’re inside the organization
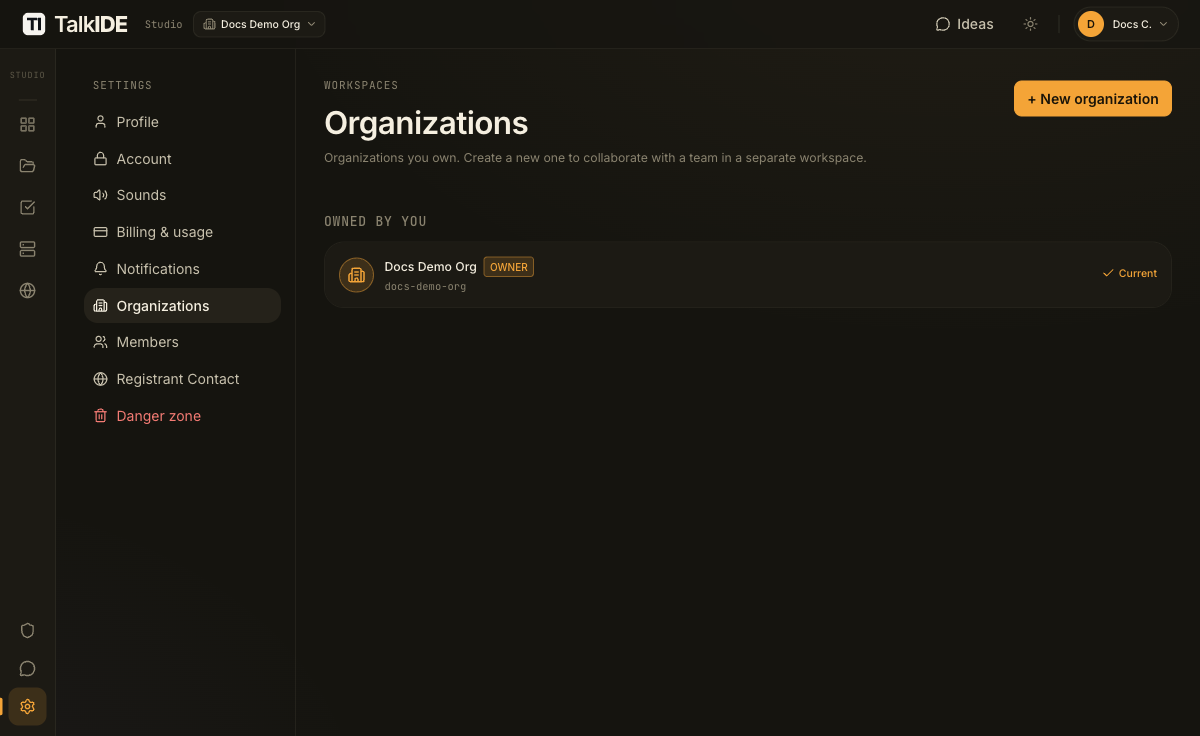
After switching, the top bar shows your organization’s name instead of your personal workspace, and the Organizations tab marks it as your current context. This is also the moment a new Members tab appears in Settings. It only shows up once you’re actually working inside an organization.
Step 2: Invite your teammate
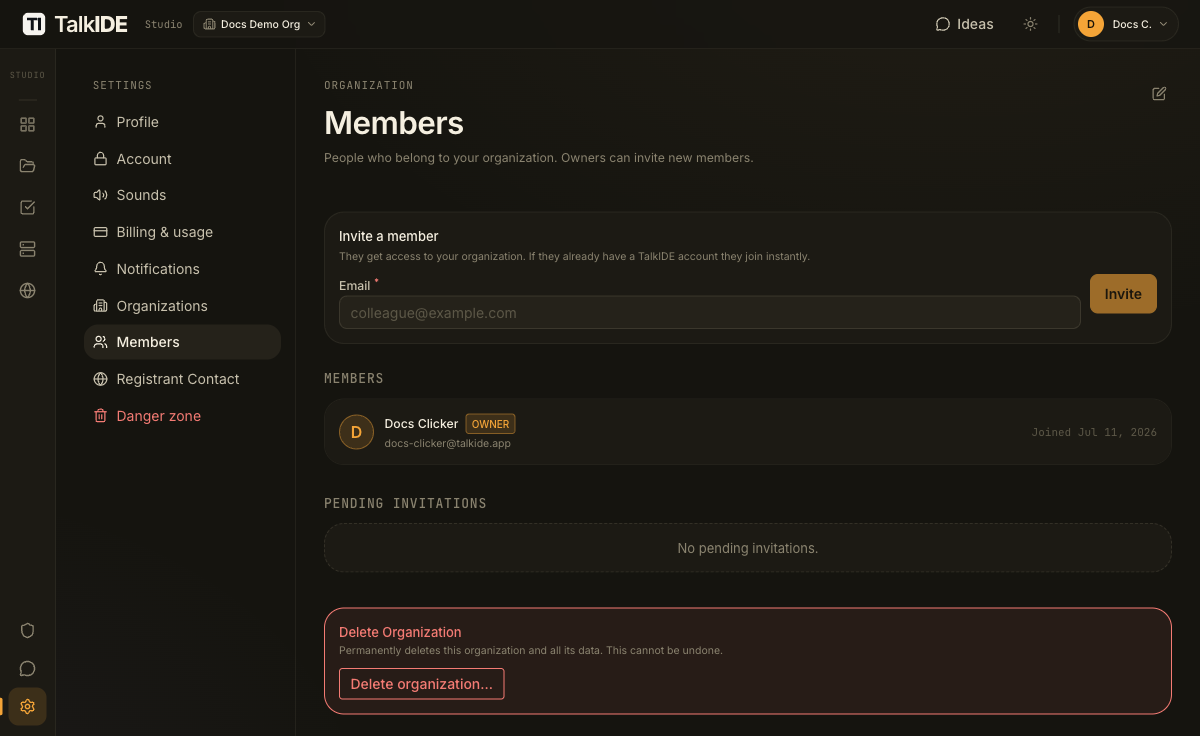
Open the Members tab. This is where you see everyone in your organization and invite new people. Only the Owner can send invites.
Type your teammate’s email address into the invite field and click Invite.
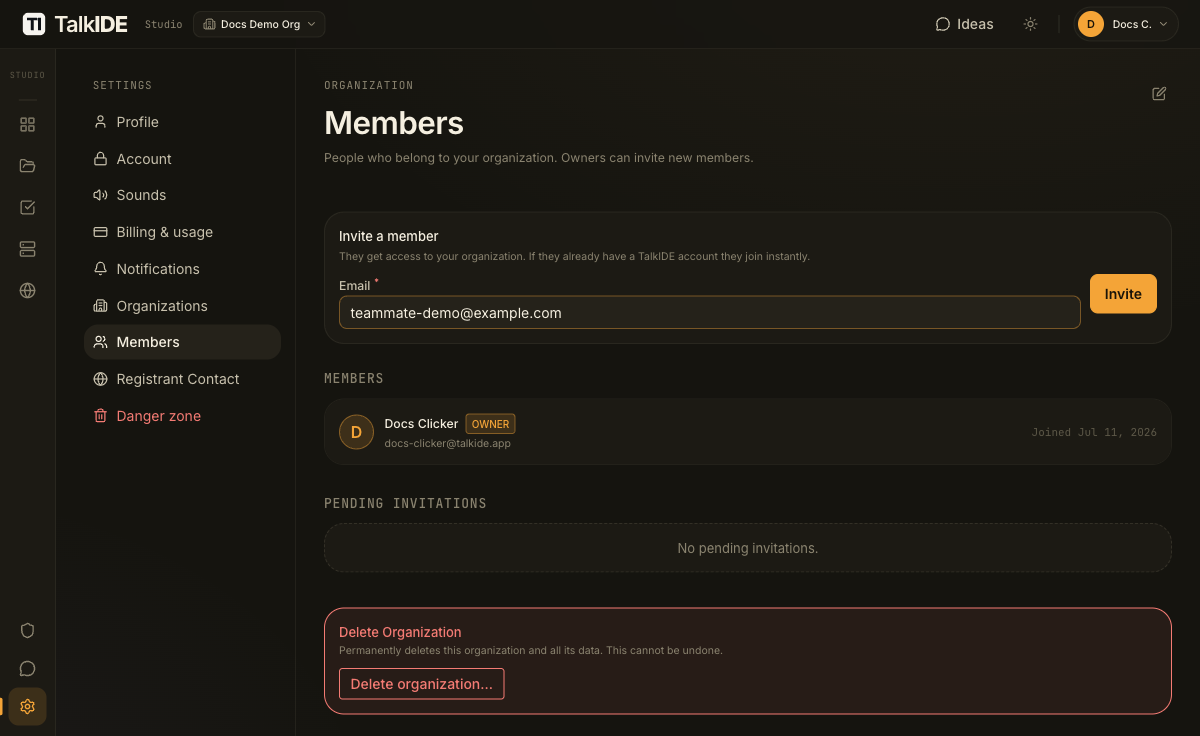
What happens next depends on whether that email already has a TalkIDE account.
- If they already use TalkIDE, they’re added to your organization immediately. No email goes out and there’s nothing further for them to do. Next time they sign in, your organization is simply there in their workspace switcher.
- If the email is new to TalkIDE, an invitation email goes out instead, and your teammate shows up under Pending Invitations until they act on it.
If they’re new to TalkIDE
Your teammate gets an email with a link. Opening it takes them to a combined sign-up and join page: they set their name and a password, click Join organization, and land straight inside TalkIDE as a member of your organization. There’s no separate step to accept afterward.
Because this is a real signup, they also get the same one-time $10 starting AI credit that any new TalkIDE account gets.
Managing a pending invitation
Until your teammate accepts, they sit under Pending Invitations on the Members tab, along with the date they were invited.
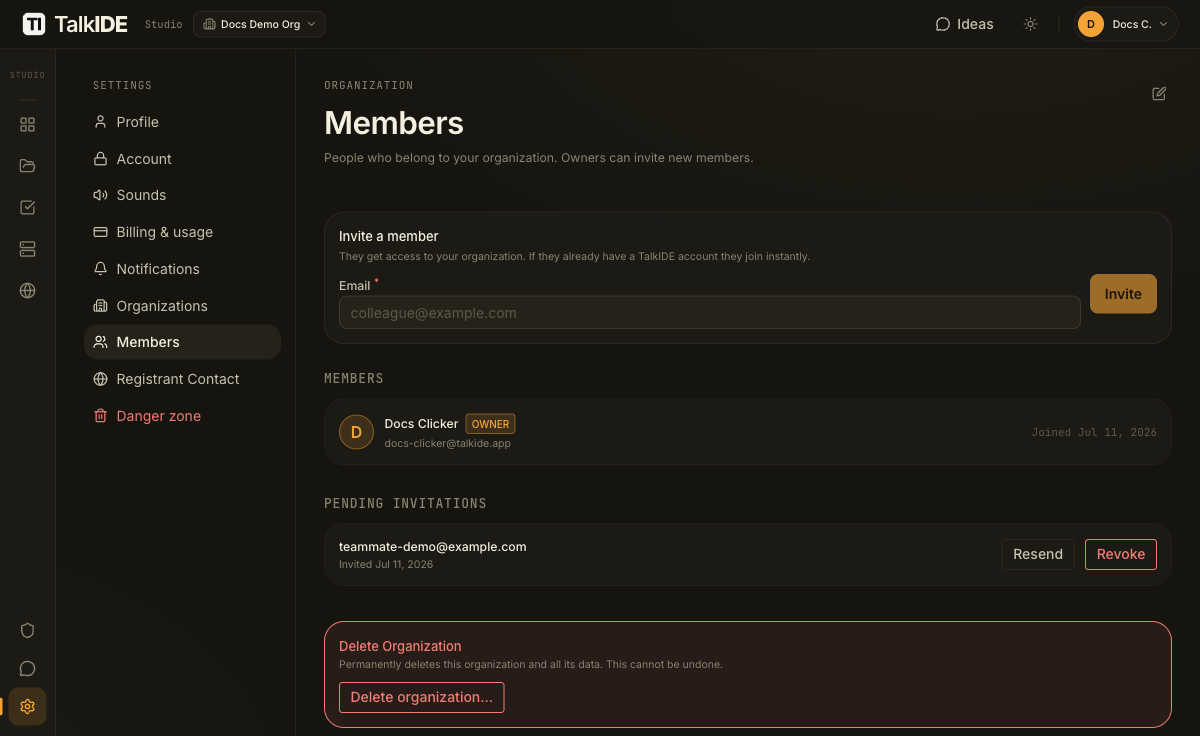
From there you can resend the invitation email if it never arrived, or revoke it if you invited the wrong address or changed your mind.

Invitations don’t stay open forever: they expire after 7 days. If one expires before your teammate gets to it, just click Resend.
Related
- Individual and Organisation accounts: a full reference on how the two account types differ.
- Invite an organization member: the quick-reference version of this same flow, plus removing members and transferring ownership.
Thanks for the feedback.