Share a project with a collaborator
Give another person or team full access to one of your projects, without adding them to your whole organization. This is the way to bring in a freelancer, a client, or another company on a single project while keeping the rest of your work private.
Before you start
- You must be the Owner of the project you want to share. Only the owner can add or remove collaborators.
- A collaborator gets full access to this one project: chat, files, database, git, deployments, secrets, and project management (epics, sprints, issues). They cannot delete or archive the project, provision a new database, or manage the collaborator list. Those actions stay with the owner.
- AI and hosting usage by a collaborator is billed to you, the project owner, not to the collaborator.
Steps
-
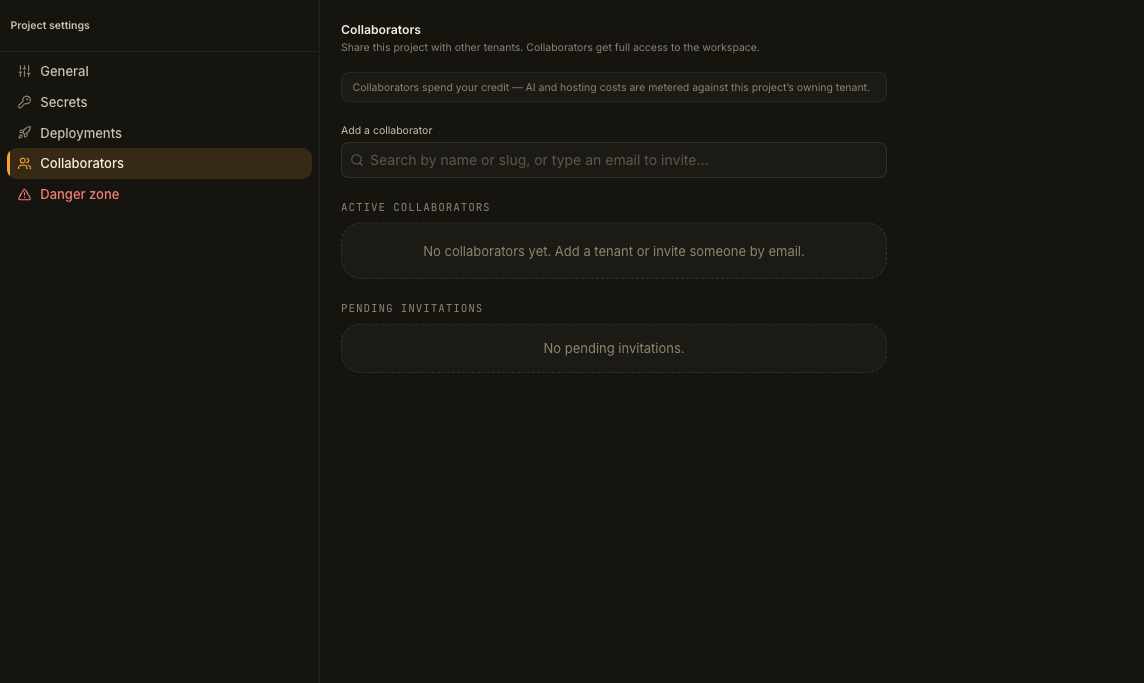
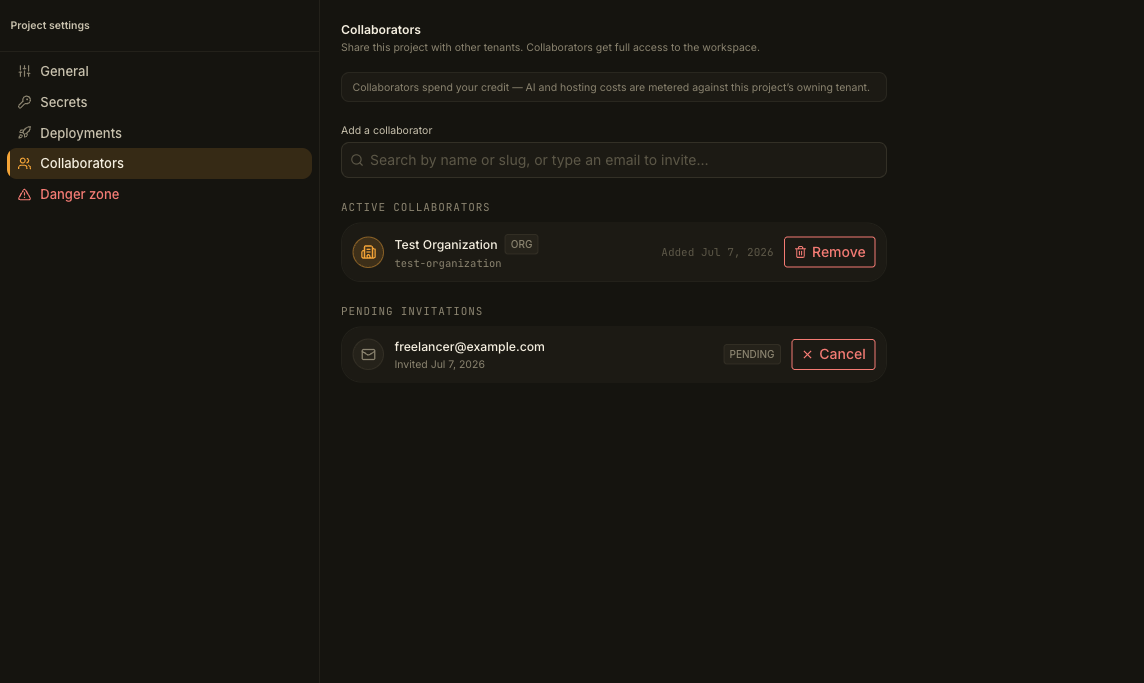
Open the project’s Collaborators settings. Open the project, click the settings icon, and choose Collaborators from the settings list. Two lists sit below the form: Active collaborators and Pending invitations. On a project with none yet, both are empty.
-
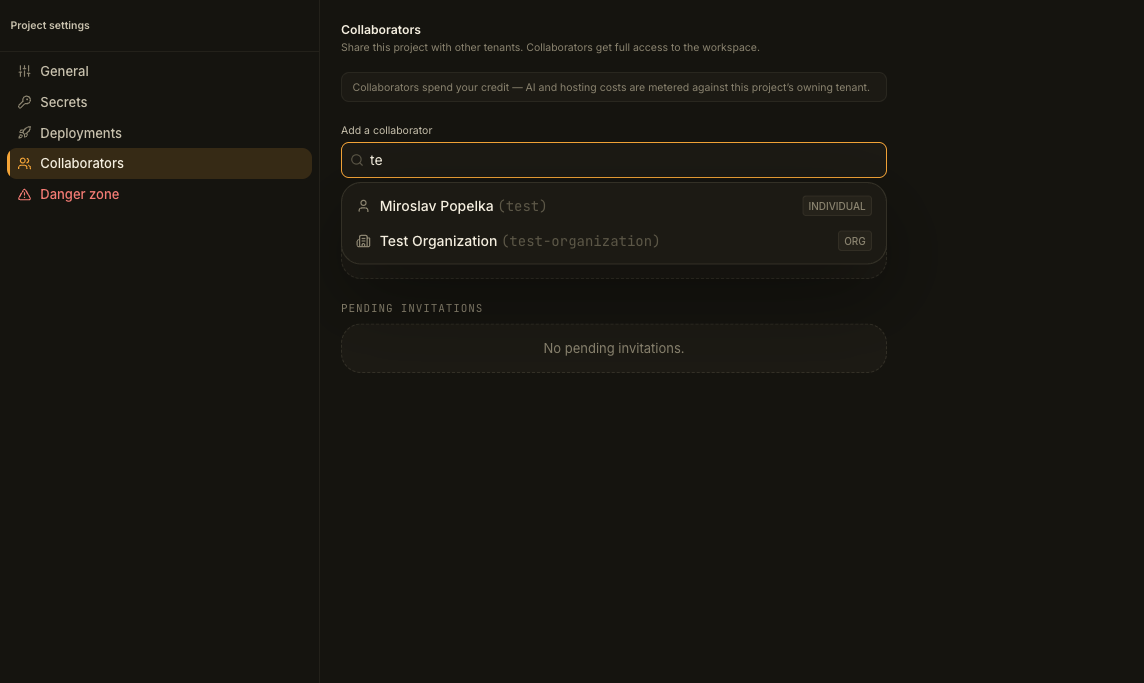
Search for an existing account. In the Add a collaborator field, type at least two characters of a name or workspace slug. Matching accounts appear in a dropdown, each labeled as an Individual or an Org.
-
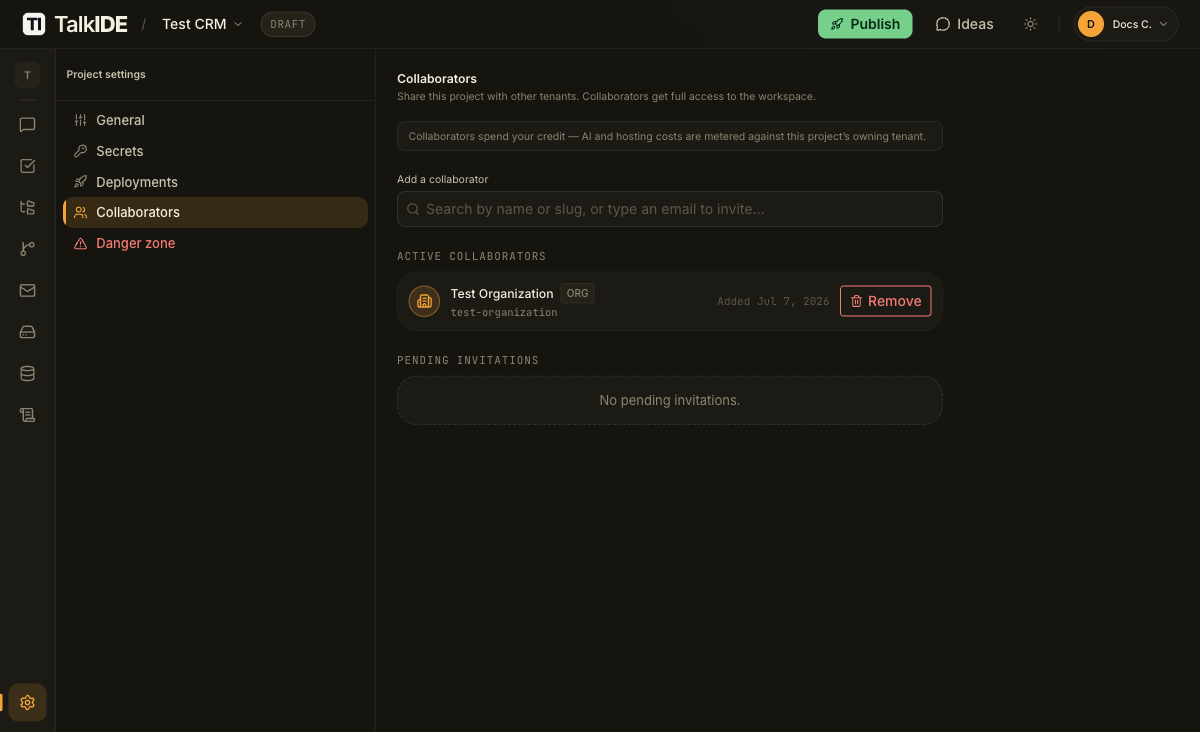
Add the account. Click a result to add it. Access is granted right away. There is no acceptance step for an account that already exists on the platform. You’ll see a confirmation naming the account, and it moves into Active collaborators along with its type, slug, and the date it was added.
If the account you add is an organization, every member of that organization gets access to the shared project by switching into that organization’s context, not only the person you picked.
-
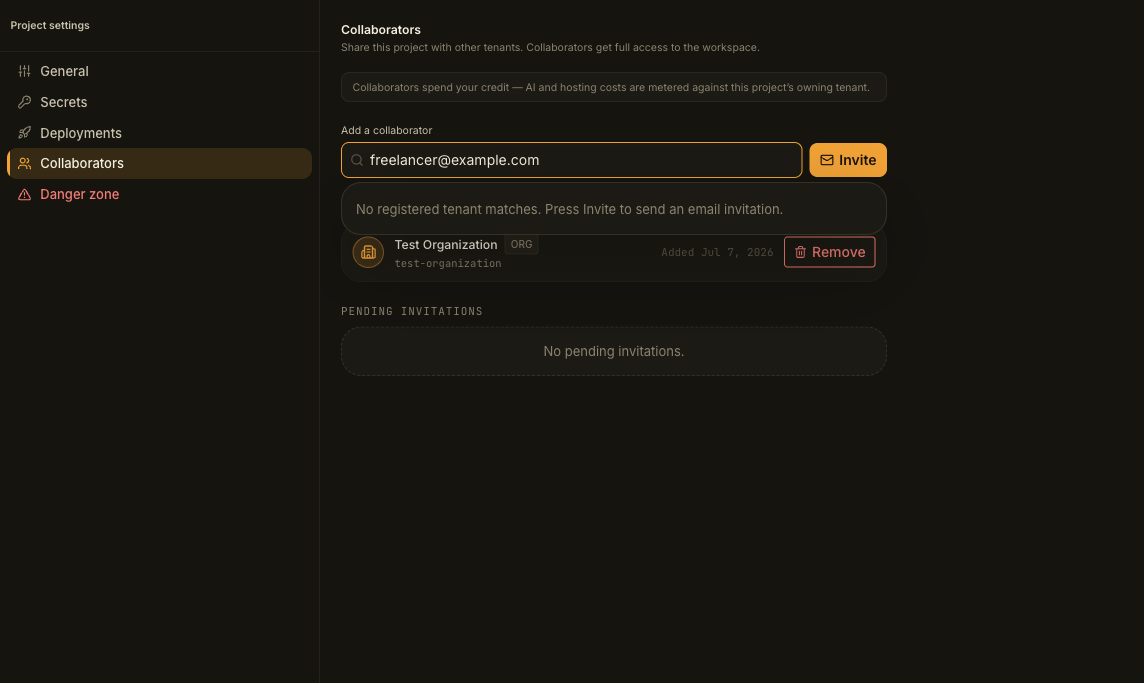
Or invite someone by email. If the person isn’t on the platform yet, type their email address into the same field instead of a name. An Invite button appears in place of the dropdown.
-
Send the invitation. Click Invite. An invitation email goes out, and the address appears under Pending invitations with a pending status and a Cancel button. It stays pending until the person accepts.
Verify it worked
Open the project’s Collaborators settings again. An account you added shows up in Active collaborators right away, with no extra step needed. An email invitation shows up under Pending invitations marked as pending until the recipient accepts it.
Remove a collaborator or cancel an invitation
- Remove an active collaborator: click Remove next to their name and confirm. Access is revoked immediately. If the collaborator is an organization, every member of that organization loses access at the same time.
- Cancel a pending invitation: click Cancel next to the address and confirm. The invitation link stops working right away.
Notes
- You cannot add yourself or your own organization as a collaborator on your own project.
- You cannot add the same person or organization twice. If they’re already a collaborator, adding them again is blocked.
Related
- Invite an organization member: want to give someone access to your entire organization instead of just one project? That’s a different flow.
Thanks for the feedback.